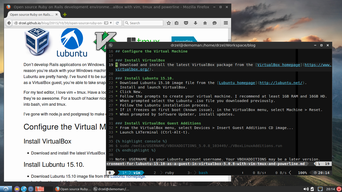
Open source Ruby on Rails development environment for Windows, running Lubuntu 15.10 as a guest in VirtualBox with vim, tmux and powerline


Don’t develop Rails applications on Windows. I’ve tried, it sux. But if you’re like me and for whatever reason you’re stuck with your Windows machine? Oracle’s VirtualBox and lightweight Ubuntu flavour Lubuntu are pretty handy. I’ve found it to be surprisingly stable and streamlined. What’s more, by running as a VirtualBox guest, you’re able to take snapshots of the current machine state, which is very handy.
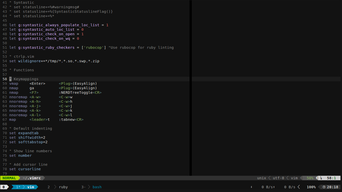
For my text editor, I love vim + tmux. Have a look at Nick Nisi’s awesome presentation explaining why they’re so awesome. For a touch of hacker niceness, I’ve included instructions on integrating powerline into bash, vim and tmux. I’ve gone with node.js and postgresql to make deploying to Heroku as painless as possible.
Configure the Virtual Machine
Install VirtualBox
- Download and install the latest VirtualBox package from the VirtualBox homepage.
Install Lubuntu 15.10.
- Download Lubuntu 15.10 image file from the Lubuntu homepage.
- Install and launch VirtualBox.
- Click New.
- Follow the prompts to create your virtual machine. I recommend at least 1GB RAM and 16GB HD.
- When prompted select the Lubuntu .iso file you downloaded previously.
- Follow the Lubuntu installation process.
- If it freezes on first boot (known issue), in the VirtualBox menu, select Machine > Reset.
- When prompted by Software Updater, install updates.
Install VirtualBox Guest Additions
- From the VirtualBox menu, select Devices > Insert Guest Additions CD image…
- Launch LXTerminal (Ctrl-Alt-t).
$ sudo /media/USERNAME/VBOXADDITIONS_5.0.8_103449/./VBoxLinuxAdditions.runNote: USERNAME is your Lubuntu account username. Your VBOXADDITIONS may be a later version.
- Reboot machine.
- From the VirtualBox menu, select Devices > Shared Clipboard > Bidirectional.
Configure the development environment
Install packages
- Launch LXTerminal.
$ sudo apt-get install build-essential curl git cmake postgresql postgresql-contrib libpq-dev python-dev python-pip python3-dev python3-pip vim-gnome tmux gnome-terminalMake gnome-terminal default terminal emulator
$ sudo update-alternatives --config x-terminal-emulator- Select
gnome-terminal.wrapper. - Reboot machine.
Install RVM and Rails
- Launch gnome-terminal (Ctrl-Alt-t).
- Click Edit > Profile Preferences > Command.
- Check ‘Run Command as a login shell’.
- Click Close.
Note: If you are not using gnome-terminal check the RVM integration docs for the correct settings for your terminal emulator.
$ gpg --keyserver hkp://keys.gnupg.net --recv-keys 409B6B1796C275462A1703113804BB82D39DC0E3
$ \curl -sSL https://get.rvm.io | bash -s stable --rails
This will take a while. Once finished:
- Close and then reopen gnome-terminal.
To confirm RVM installed correctly:
$ type rvm | head -n 1If everything went smoothly you should see rvm is a function.
Configure PostgreSQL
Create a PostgreSQL user with the same username and password as your Lubuntu login.
$ sudo -u postgres createuser -s USERNAME- Log in.
$ sudo -u postgres psql- Set your account password.
postgres=# \password USERNAME
- Enter and confirm password.
- Log out.
postgres=# \q
Install Node.js
$ curl --silent --location https://deb.nodesource.com/setup_4.x | sudo bash -
$ sudo apt-get install --yes nodejs
Configure Git
$ git config --global user.email "YOUR.EMAIL@ADDRESS.COM"
$ git config --global user.name "YOUR NAME"
Install powerline
$ sudo pip install powerline-statusInstall powerline fonts
$ wget https://github.com/powerline/powerline/raw/develop/font/10-powerline-symbols.conf
$ mv PowerlineSymbols.otf /usr/share/fonts/
$ fc-cache -vf /usr/share/fonts/
$ mv 10-powerline-symbols.conf /etc/fonts/conf.d/
Configure powerline for bash
- Append to
~/.bashrc
# Load powerline
powerline-daemon -q
POWERLINE_BASH_CONTINUATION=1
POWERLINE_BASH_SELECT=1
. /usr/local/lib/python2.7/dist-packages/powerline/bindings/bash/powerline.sh
Configure powerline for vim
- Append to
~/.vimrc(create if necessary)
" Load powerline
set rtp+=/usr/local/lib/python2.7/dist-packages/powerline/bindings/vim

" Always show status bar
set laststatus=2

" Don't wait for escape key
set timeoutlen=1000 ttimeoutlen=0

" Hide -- INSERT -- text in vim status bar
set noshowmode
Configure powerline for tmux
- Append to
~/.tmux.conf(create if necessary)
# Load powerline
source /usr/local/lib/python2.7/dist-packages/powerline/bindings/tmux/powerline.conf

# Don't wait on escape
set -sg escape-time 0
Confirm working
$ rails new temp-rails-project
$ cd temp-rails-project
$ rails s
Then point your browser to localhost:3000. If you see the Rails ‘Welcome aboard’ site you’re good to go. When you’re done you can remove the temp-rails-project folder.
$ rm -rf temp-rails-project
